#
All the appointments you have booked will appear in this section.
Here, you can view detailed information about each appointment — including the date, treatment coverage, clinic name, and the QR code used for check-in when you arrive at the clinic.
a) Upcoming Appointments List #
On the main Appointment page, you will see a list of your upcoming appointments.
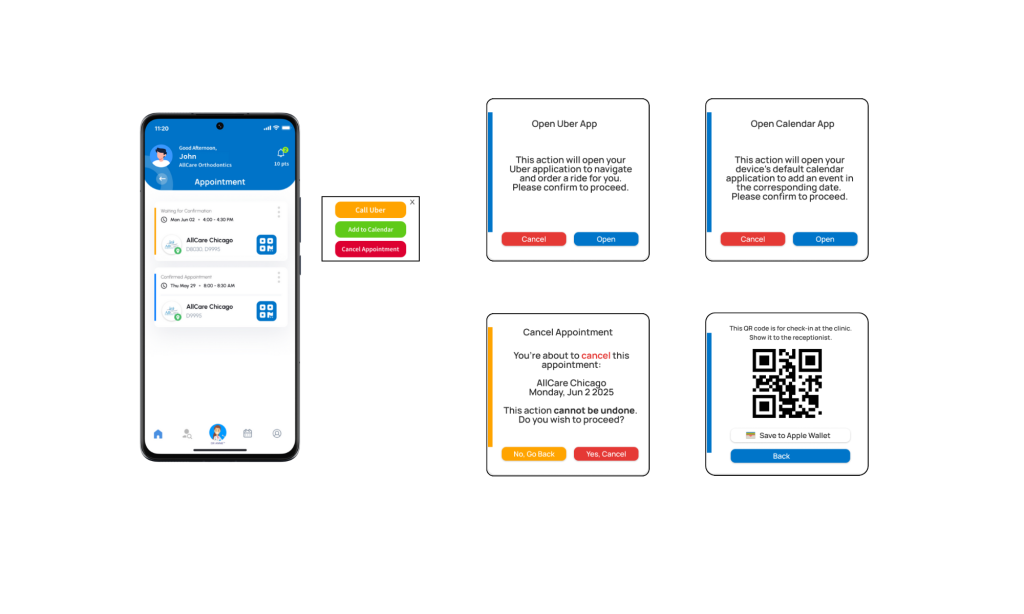
Each appointment has a colored bar on the left side that indicates its status:
- Orange Bar → Waiting for Confirmation
- Your appointment has been submitted to the clinic but has not yet been accepted or declined.
- Blue Bar → Confirmed
- The clinic has confirmed your appointment. You can visit the clinic according to the scheduled time.
b) Appointment Options Menu #
On the right side of each appointment, you’ll find a three-dot menu (⋯) that contains the following options:
- Open in Uber – Redirects you to the Uber app for navigation to the clinic.
- Add to Calendar – Adds your appointment to your personal calendar.
- Cancel Appointment – Cancels the selected appointment.
c) Appointment QR Code #
Also on the right side, there is a QR Code icon.
Tap this icon to open a pop-up window showing the QR code for clinic check-in.
Tip: You can save this QR code to your Apple Wallet for quick and easy access anytime.
d) Canceling an Appointment #
You can cancel an appointment at any time — whether it is still Waiting for Confirmation or already Confirmed.
To cancel:
- Tap the three-dot menu (⋯) on the main appointment list, or
- Open the Appointment Detail page and tap Cancel Appointment there.
e) Appointment Detail #
Tap any appointment from the list to open its Appointment Detail page.
Here you can view:
- Complete appointment details
- Clinic and treatment information
- Payment options
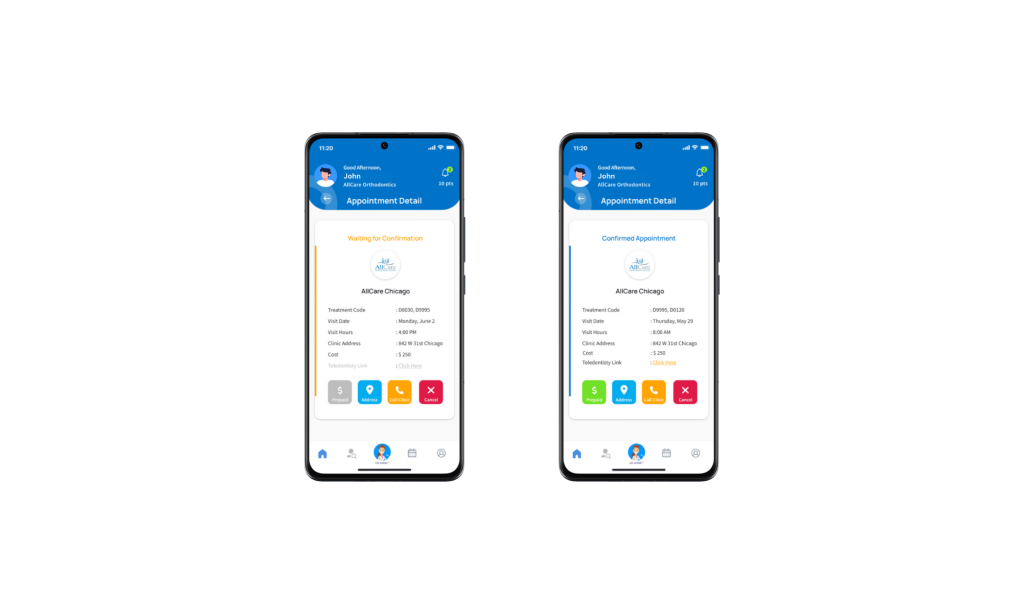
This page also includes a Prepaid button if your appointment is eligible for advance payment.
f) Prepaid Appointment #
You can only make a Prepaid Appointment once your booking has been confirmed by the clinic.
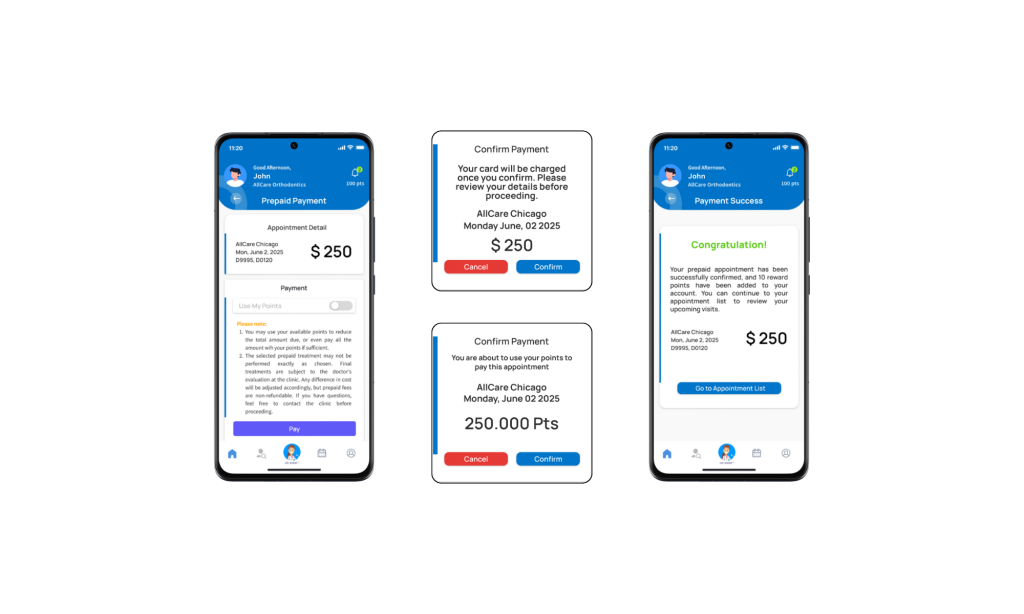
- Payments are processed securely via the Stripe portal, using any available payment method offered there.
- You may also choose to pay partially or fully using your accumulated Points. To learn more about points, refer to the Points Guide.
Once the payment is successful:
- You will receive an email notification confirming your payment.
- You can then visit the clinic without needing to make any further payments on-site.
Tips:
- Save your QR code to Apple Wallet for faster check-in at the clinic.
- You can use your points to partially or fully pay for an appointment.
- If your plans change, cancel early to free the slot for other patients.


