DR. ANNIE™ stands for Data Research Artificial Neural Network Intelligence Expert.
It is a real-time AI-based dental needs evaluation system designed to help users identify their dental conditions and potential treatment needs before visiting a dentist.
As a platform that integrates DR. ANNIE™, iSmartOffice™ enables users to conveniently access their AI-generated dental evaluations anytime, anywhere.
Overview of the DR. ANNIE™ Dental Evaluation Page #
The main page of DR. ANNIE™ Dental Evaluation consists of three primary sections:
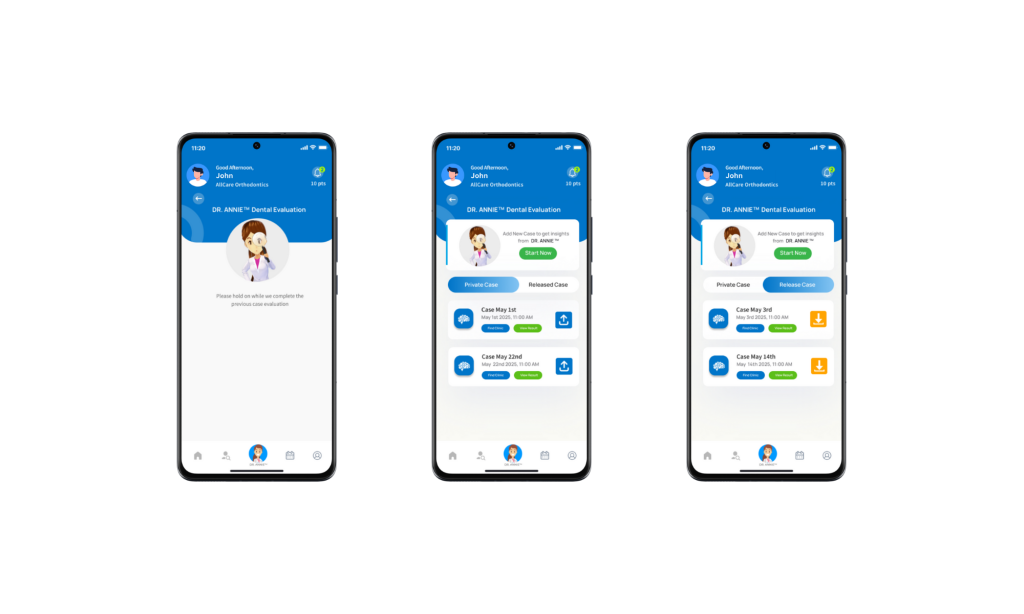
- DR. ANNIE™ Card – Includes a “Start Now” button to begin a new dental evaluation session.
- Private Tab – Displays your personal evaluation cases that have been submitted but not shared with any providers or clinics. Only you can view these cases.
- Released Tab – Contains evaluation cases that have been submitted and shared (released) with dental providers, following Personal Health Information and HIPAA compliance standards. These cases are visible to providers who may assist you as a patient.
How to Get a Dental Evaluation Using DR. ANNIE™ #
a) Start the Evaluation #
Tap Start Now to begin your dental evaluation session.
Note: DR. ANNIE™ requires access to your device’s camera or gallery. Please grant permission when prompted.
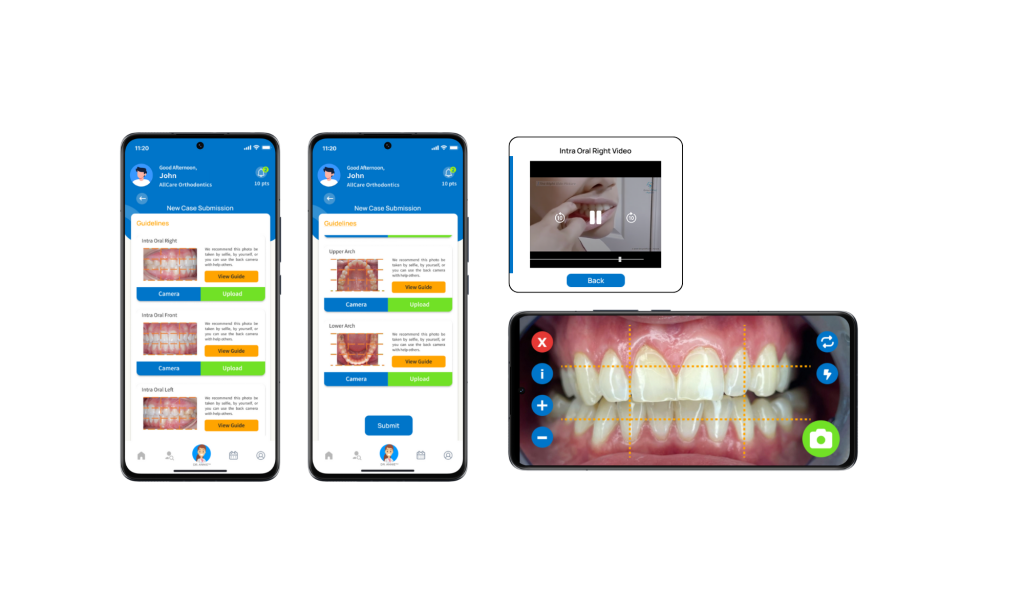
b) New Case Submission #
You will be directed to the New Case Submission page.
- Tap “Guideline” in the upper-left corner to view instructions.
- Below, you will see five required photo sections, each with detailed guidance on how to capture or upload the images.
- For each section, you can either take a photo with your camera or upload an existing photo from your gallery.
The five required dental images are:
- Intraoral Right
- Intraoral Front
- Intraoral Left
- Upper Arch
- Lower Arch
Tip: It is recommended to have someone assist you using the rear camera to capture clearer images.
Once all five images have been uploaded, tap Submit at the bottom of the page.
c) Processing the Case #
After submission, you’ll return to the main DR. ANNIE™ Dental Evaluation page.
A new case will appear with the Digibrain4 icon on a yellow background, indicating that your case is currently being processed.
d) Evaluation Completion #
When your evaluation is complete:
- You will receive a push notification and an email containing a link to your detailed dental evaluation.
- The Digibrain4 icon will change to a blue background, meaning the process has finished.
From here, you can:
- Tap Find Clinic to discover the best clinics based on the treatment code generated by your evaluation results, or
- Tap View Result to review the evaluation summary first.
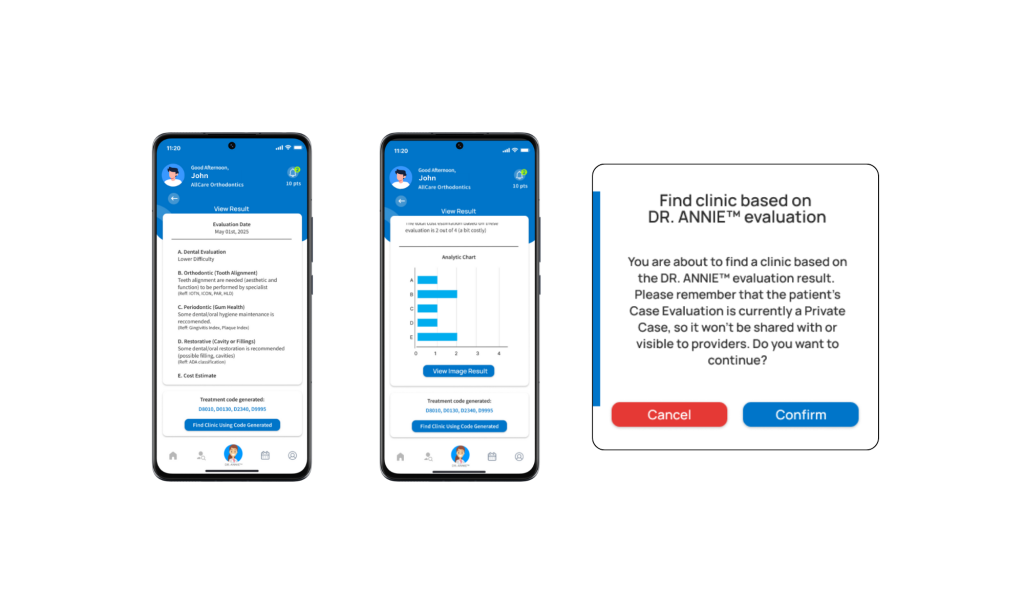
e) Viewing the Evaluation Result #
The View Result page displays a detailed summary, including:
- Difficulty Level
- Tooth Alignment
- Gum Health
- Cavities or Fillings
- Cost Estimation
- Analytic Chart
- Image Result
At the bottom of the page, you will find an automatically generated Treatment Code, based on your dental condition.
This helps both you and your dental provider during future appointments.
f) Releasing the Case to Your Provider #
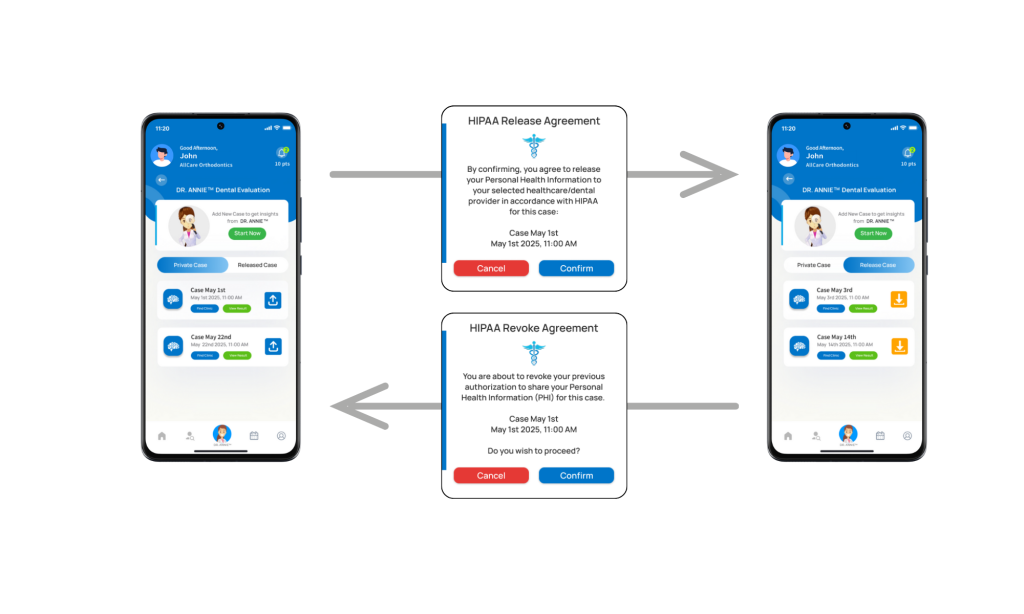
If you wish to share (release) your evaluation case with your dental provider:
- Tap the upward arrow icon.
- Confirm the HIPAA compliance pop-up to approve data sharing.
g) Learn More About DR. ANNIE™ #
That’s the full process of performing a dental evaluation using DR. ANNIE™.
If you’d like to learn more about how DR. ANNIE™ works, please visit the Knowledge Hub at:
🔗 https://knowledge-hub.ismartdds.com
Tips:
- Ensure good lighting when taking dental photos for more accurate results.
- Use the back camera and ask someone to help if possible.
- Save your evaluation results before releasing the case to your provider.


